How to fix error 0x80246017 in Windows 10?
Error 0x80246017 you can meet while trying to upgrade operating system Windows 10. Quite recently, Microsoft has released an update KB4020102, and people who are trying to keep their computers constantly updated, tried to install it manually.
However, the process of patching some of them were over the specified error 0x80246017. A more thorough study of the problem showed that the update could not be installed automatically for the vast number of users.
If the PC owner will check the history in Windows update, it finds the update KB4020102 was loaded into the system, but for some reason it was not installed. Although some users indicated that the error 0x80246017 can happen not only with the mentioned update, it is also and many others.

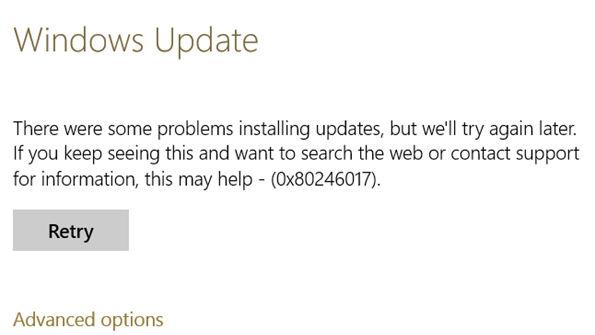
So, what happens during the appearance of this error? At first, everything goes fine, the update downloaded, installed, but at some point the process stops, and then appears on the screen similar to the following message occurred during the installation of the update problems.
According to Microsoft, the cause of the error 0x80246017 belongs in build 9926 for Windows 10, which was released in January 2015. Though it took a huge amount of time, but, so to speak, the remnants of the entries in the Windows Registry can intervene in the process of installation current updates.
Important note: any sloppy editing Windows Registry can cause serious problems with the performance of the operating system or even the blue screens of death.
- Press on the keyboard Win+R.
- Enter in an empty string regedit.exe and press Enter.
- Click on the tab in the Registry, and then click “File→Export”.
- Select the location to which you want to save the file backup Registry.
- If something goes wrong after the implementation of the following steps, then use the created file to put our Affairs in order.
So now, let’s discuss the method by which you will be able to try to get rid of errors 0x80246017 when you upgrade to Windows 10.
Step 1. Delete the installation files of previous Windows
- Right-click the mouse on start and select “Command prompt(admin)”.
- Enter a string command rundll32.exe pnpclean.dll,RunDLL_PnpClean /DRIVERS /MAXCLEAN
- Close the Command prompt.
- Press Win+S and type in the search bar “Freeing space…”.
- With the help of this tool, get rid of Temporary files and installation files from the previous Windows.
- After completing the previous steps, restart your computer.
Step 2. Reset a few Windows Registry
- Press on the keyboard Win+R.
- Enter regedit.exe and press Enter.
- Go to HKEY_LOCAL_MACHINE\SOFTWARE\Microsoft\WindowsSelfHost\Applicability.
- Find BranchName key and double-click on it. If it would have the value FBL_AWESOME150, then everything is fine. If not, then enter it there yourself.
- Next, locate the key TresholdRiskLevel and change its value to low.
- Find the keys TresholdInternal and TresholdOptedIn, and then delete them.
- Close Windows Registry and restart your computer one more time.
Download Windows 10, try again to download and install an update for the OS, which previously was a problem in the form of errors 0x80246017.