How to Install a CPU on the Motherboard?
Afraid you won’t be able to install a CPU on your motherboard? Don’t fret, it’s extremely easy!
CPU is the brain of every computer. In more technical terms, the CPU is a highly complex chip that processes machine code, takes care of all sorts of operations, and controls the peripherals in the system. Overall, the CPU has an extremely important role in every computer.
In this article, we will take an in-depth look at the process of installing or replacing the CPU on your motherboard. Trust us, the process is fairly straightforward, designed for users who have no in-depth knowledge of electronics or computer technology. If you are building a new computer or want to replace an old, outdated CPU in your PC – follow the information below and you won’t have any issues.
A Guide to Installing a CPU on the Motherboard
So, first let’s ask a fairly obvious question that arises for many users who have never replaced any parts in their PC: does it matter what kind of CPU I want to put in for the installation process? The short answer is no. The slightly more detailed answer – there are some nuances, but they are not about the installation process itself, but about your motherboard and such things as sockets, which we will touch on a bit later. The installation process itself, i.e. putting a “stone” into the motherboard, is virtually identical for CPUs from all manufacturers.
Socket and Heat Sink Requirements
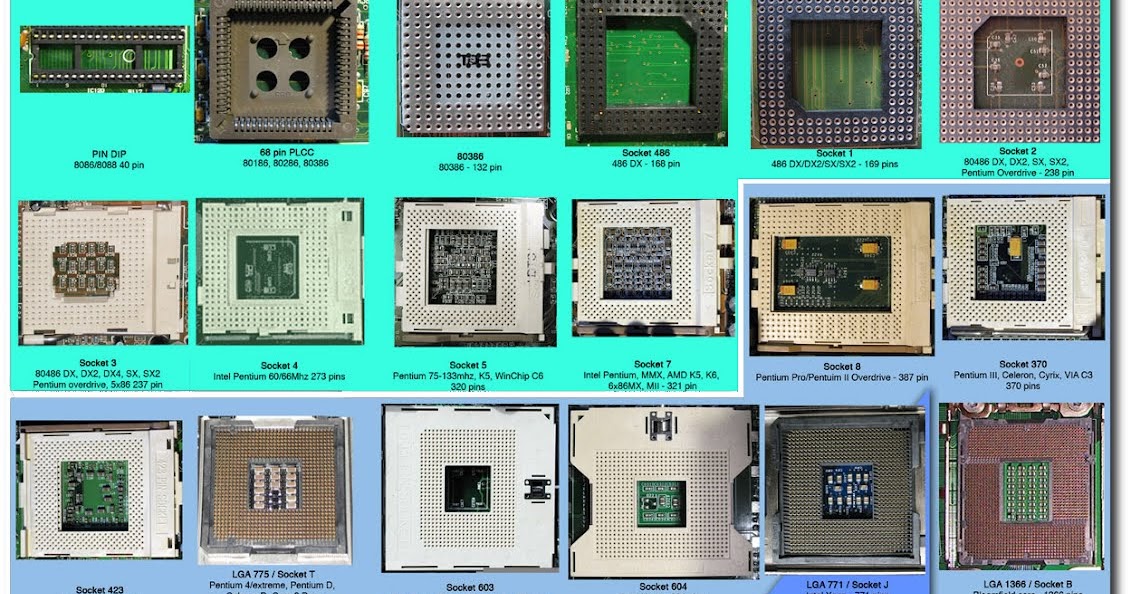
Let’s now talk about the nuances – the sockets. So, what is a socket? In essence, the socket is a small hole or a slot in the computer’s motherboard, into which is placed (or installed) CPU. The difference in sockets will determine whether you can install a CPU to your motherboard or not.
At the moment, there is just an incredibly large number of sockets for processors for both Intel and AMD. Each processor will only be suitable for a certain socket. For example, do you want to build a supercheap system with AMD FX 4300 processor? For this you will need AM3 socket motherboard. Or, for example, if you want to build a budget socket, you will need to build an AM4 socket. For example, do you want to build a reasonably priced system with AMD FX 4300 processor? For this you will need AM3 socket motherboard. Or for example if you wanted to build a gaming machine with i5 7600k CPU? Here you will need to buy a motherboard with socket LGA1151.
So, you get the idea. If you want to install a specific processor into your motherboard, then make sure that you have the right socket. However, there is more than just the correct socket. There is another little detail that you need to consider when choosing and installing a CPU. This thing is the TDP – the heat output of the CPU under heavy, but not maximum load, which its cooling system should be able to handle. So yes, the TDP is primarily for selecting a CPU cooling system. Among other things, the CPU TDP will also tell you whether or not it will work on your motherboard, i.e. whether or not it can fully handle it.
You can find out the supported TDP on the box of the motherboat or on the official website of the motherboard manufacturer. For example, take the processor from Intel – i5 7600k. Its TDP value is 91 watts. According to this requirement, you need to choose a motherboard for this processor, which can support the same or higher heat output, for example, 125 watts. So what would happen if I put a 125W CPU on a motherboard that only supports 95W? Well, there is a few possibilities and none of them are good: the CPU may not be detected by the BIOS/UEFI, it may run at too low of a frequency, or it may run very unstable.
How to Handle the CPU
Now let’s talk about the next critical point: CPU handling. When you replace or install a new CPU for your motherboard you must be very careful with the pins on the processor chip because they are very easily damaged. It is best to pick up the CPU by the edges, and if you need to put it somewhere, put it with the pins facing up. Among other things, do not place the CPU on a surface that can release static electricity. Basically, that’s all you need to know about handling PC processors. Let’s now get to the main part of the article – installing or replacing a CPU on the motherboard.
Installing a CPU on the Motherboard
So, after reviewing everything in this article in detail, let’s proceed directly to installing the processor into your motherboard. Lay your case on a table, for example, with all the wires disconnected, and then open it up. Before you install the new CPU, you need to remove the old CPU from the motherboard. Disconnect the power to the cooler first:
After unplugging the cooler, detach it and the heat sink from the motherboard, and then clean any thermal paste, if it’s still present, off the surface of the processor. Next, open the latch on the socket – if there is one – and remove the processor. Then follow the instructions below.
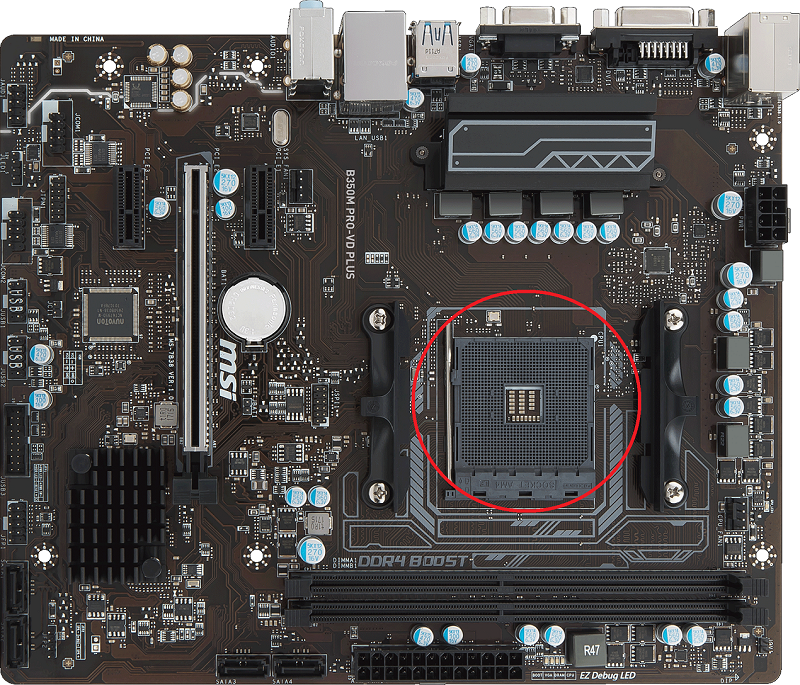
If you bought a new motherboard, just put it in front of you and have the new CPU ready. Ok, let’s look at the installation using an AM4 socket motherboard with a Ryzen 1200 processor as an example. A budget variant of the new system, which, however, is not so important in our case. Here is how the AM4 socket will look like on our MSI B350M PRO-VD PLUS mainboard:
Now let’s unpack the processor and carefully examine it for the following symbol:
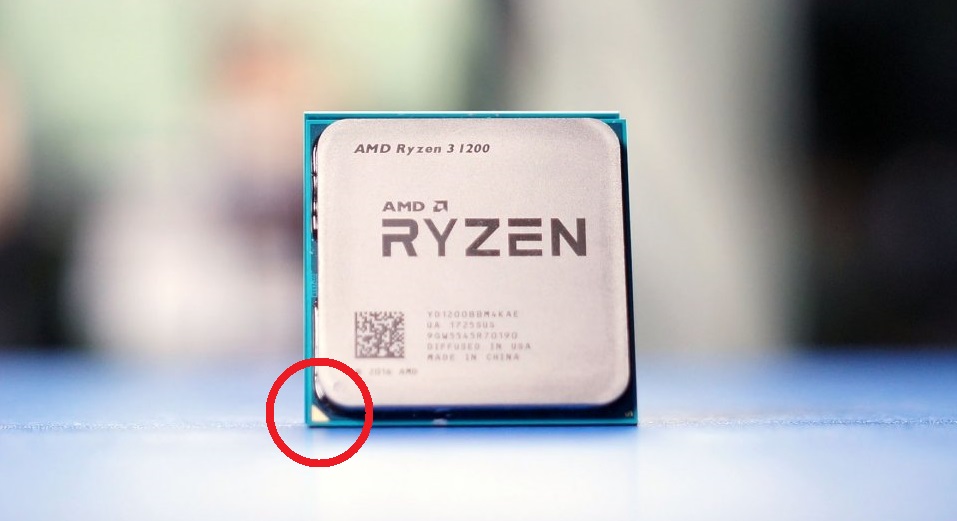
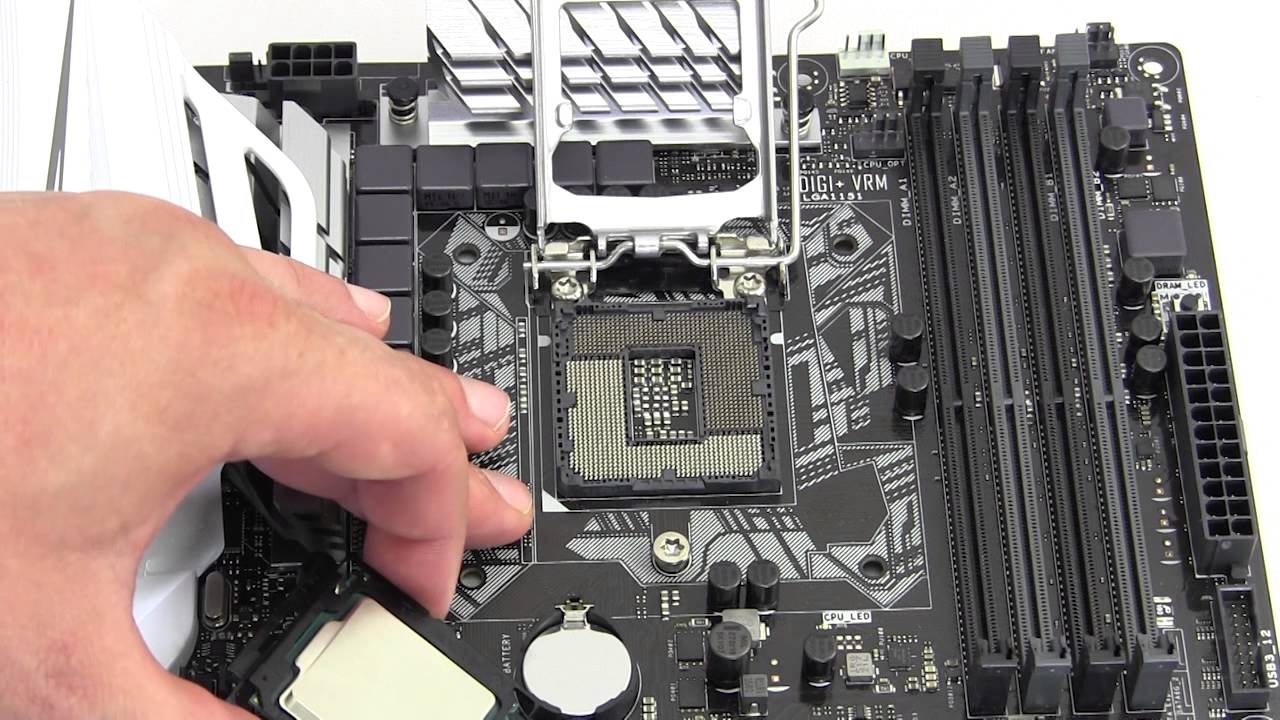
As you may have already guessed, you need to put the processor into the socket by matching these two triangles:
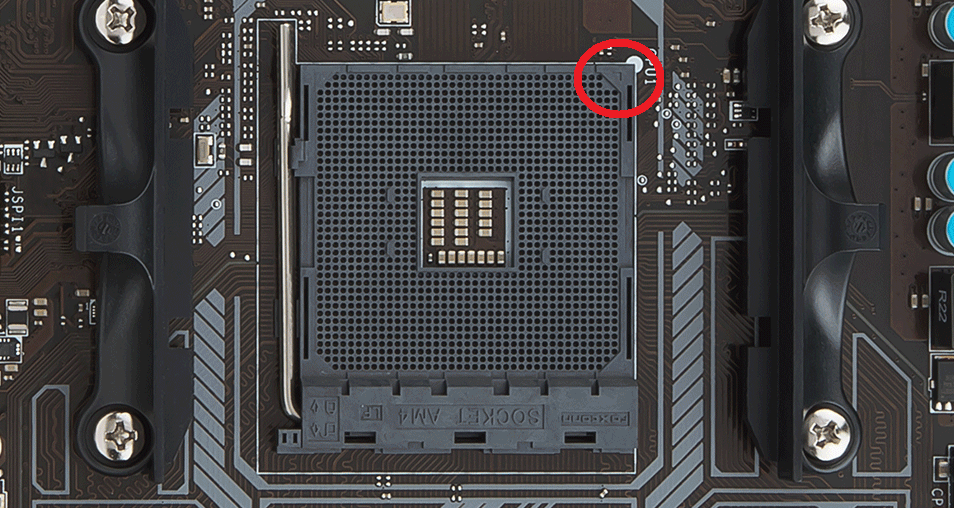
However, before you put the processor into the socket, you must first open it by lifting the clamp lever to the top (you can see it in the screenshot). After opening the socket, carefully place the processor onto it, according to the two triangles. You don’t need to press anything or try to move the processor in the socket – it will lay there right away. Once it’s in the socket, lower the latch lever and close it. This will complete the installation of the CPU.
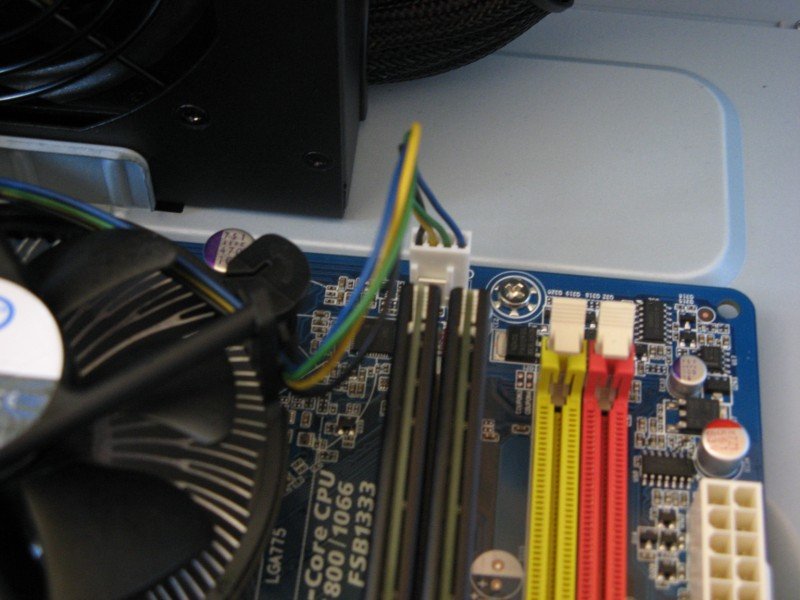
However, your business isn’t done here. It’s time to move on to connecting the power for the CPU, applying thermal paste to its surface, and installing the cooler. The easiest part is powering up the processor. Find the four pin connector on your power supply and plug it into the following connector:

The screenshot shows an 8-pin connector, but our Ryzen 1200 processor only needs a 4-pin connector, so take and plug in one 4-pin connector. Now you need to put a very thin layer of thermal paste on the processor (or cooler heatsink). If it gets too thick it will come out of the CPU when you put the cooler heatsink on top of it and you don’t want this to happen. Often users use plastic cards or thick cardboard to apply thermal paste.
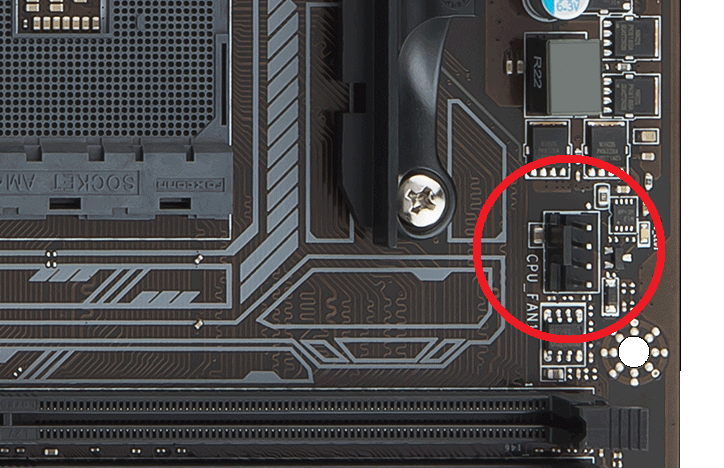
However, you don’t have to apply thermal paste if it is already included with the boxed cooler or a third party cooler. In that case, just carefully place the cooler with the heatsink on top of the processor and mount it according to the holes in the motherboard. All you have to do is to connect the CPU cooler to the power on the motherboard. Usually, this connector looks like this:
That’s it, we’re done. Of course the installation of the processor may differ a bit depending on the socket, but you will definitely won’t notice any major differences. Yes, it’s that simple. Replacing other components in your PC such as a graphics card or RAM takes even less time and effort.
So, have you installed your CPU yet? Share your results in the comments!