How to fix Destiny 2 «Termite» error?
In today’s article we will consider the error code “Termite” in Destiny 2. It’s worth saying that the number of errors that can appear during the game process or the launch of Destiny 2 is simply incredibly huge. There are so many of them that even Bungie, the developer of this game, did not fully investigate all the mistakes.
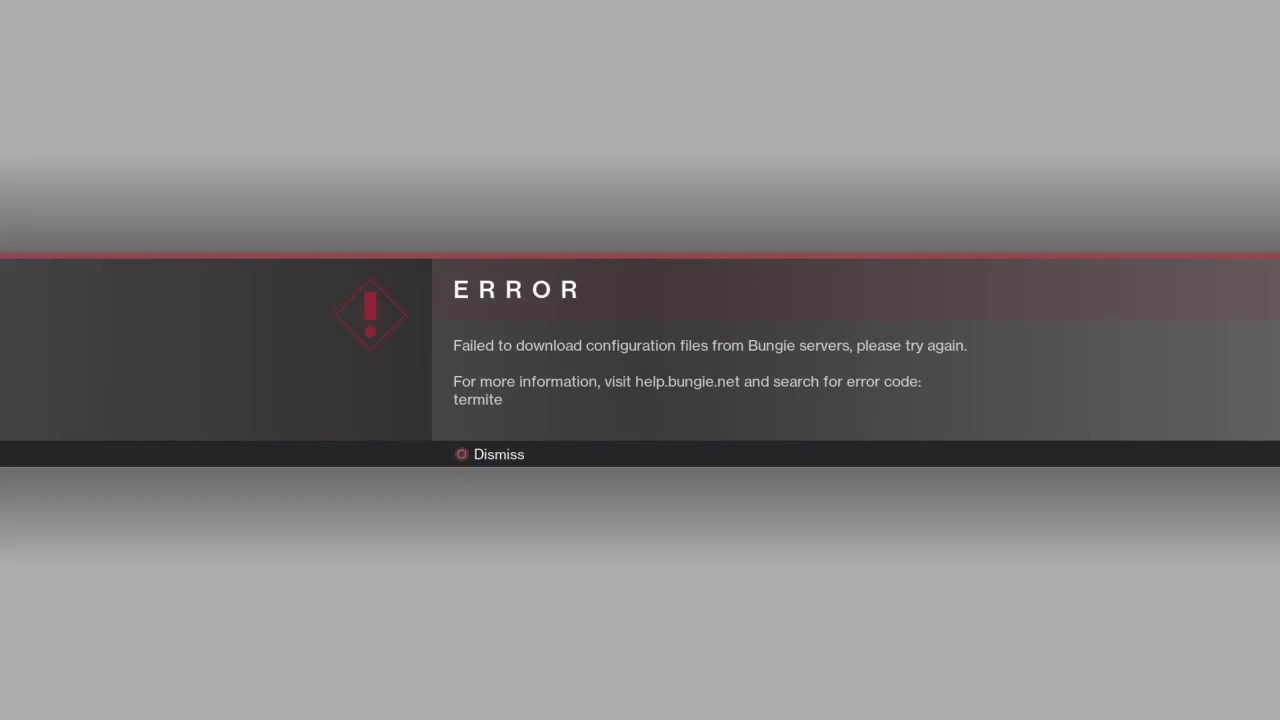
In most cases, the “Termite” error code in Destiny 2 is a problem for users on the PC platform. This error appears during an attempt to log in using personal data into the game client. Fortunately, there are several methods that can solve the “Termite” error. It’s worth noting that Bungie is likely to fix this bug in the near future, since it arose after the release of the recent patch for Destiny 2.
Contents
Fixing Destiny 2 «Termite» error
Method # 1 Using the Verification and Recovery Tool
You can enable this error with the help of the game files verification and recovery tool, which is built into the Battle.net client. A huge number of players said that they managed to eliminate the “Termite” error in Destiny 2 thanks to the built-in tool. To use it, you need to do the following:
- open the Battle.net client installed on the computer;
- click on the Destiny 2 icon;
- Click on the drop-down menu of options under the name of the game, and then
- click on the item “Check and Restore”;
- then click on the button “Start Check”;
Wait until the end of the process of checking and restoring the game files, and then check whether the “Termite” error in Destiny 2 has been fixed.
Note: if this method does not work, you can try to delete the Destiny2.exe executable file, and then repeat the entire process first.
Method number 2 Restoration of licenses
If you encounter this error on PS4, then for you there is also a solution – license recovery. This option will successfully restore licenses for all games, add-ons and add-ons that are available to your PSN account. Apply it extremely simply through the console settings:
- enable PS4 and open the Settings section;
- go to the section “Account Management”;
- then go to “Restore licenses”;
- click the “Restore” button;
Using the option to restore licenses, run Destiny 2 again and check whether the “Termite” error has been fixed. Some users have been helped by this extremely simple solution.
Method # 3 Restarting the Xbox One console
Restarting the console is another fairly basic method that can help you get rid of the Termini error in Destiny 2. Unfortunately, the method – at least according to the user’s request – works only for the version of the game for Xbox One.
- Press and hold the power button until the Xbox One is completely turned off.
- Unplug the power cord from the console, then wait for a while to remove all the accumulated cache.
- Connect Xbox One again to power, and then start it and check if the “Termite” error appears in Destiny 2.
In essence, the method is not in the reboot of the console itself, but in clearing the cache, because of which all sorts of problems can arise. A negotiated error could also occur due to the cache fault.
Method # 4 Reinstalling Destiny 2
If none of the above did not help you to fix the “Termite” error, then we recommend that you try to simply reinstall Destiny 2. It is known that reinstalling applications often eliminates problems with them. After reinstalling Destiny 2, try running it again and check if the “Termite” error appears.
We hope that this material helped you to solve the problems with Destiny 2, whether it be on PCs or consoles.